# 🔨 5: Scaffold a Nuxt App and Explore Its Architecture (Advanced)
| Project Goal | Scaffold a Nuxt app and explore its architecture |
|---|---|
| What you’ll learn | You will learn how to set up a Nuxt application and how to understand its architecture to build your own applications. |
| Tools you’ll need | A modern browser like Chrome or Firefox. A text editor of your choice. Access to a terminal. |
| Time needed to complete | 30 minutes |
# Nuxt
In very simple terms, Nuxt.js is a framework that allows us to create Vue.js applications with preset configurations for SPAs and SSR (Server Side Rendered (opens new window)) apps. In this nano you will learn how to set up a Nuxt application in your local development environment. You'll also get a first glance at its structure and how to add your own pages and components.
# Scaffolding Your App
Our first step is to scaffold our Nuxt app. For this task we will be using the create-nuxt-app (opens new window) tool that Nuxt.js provides for us.
💡
We will be using npm and npx commands in this nano, if you don't already have Node and NPM installed in your computer, head over to https://nodejs.org (opens new window) and download and install the package first.
If you have a preference for yarn or would like to try it out, head to https://yarnpkg.com (opens new window) for installation instructions.
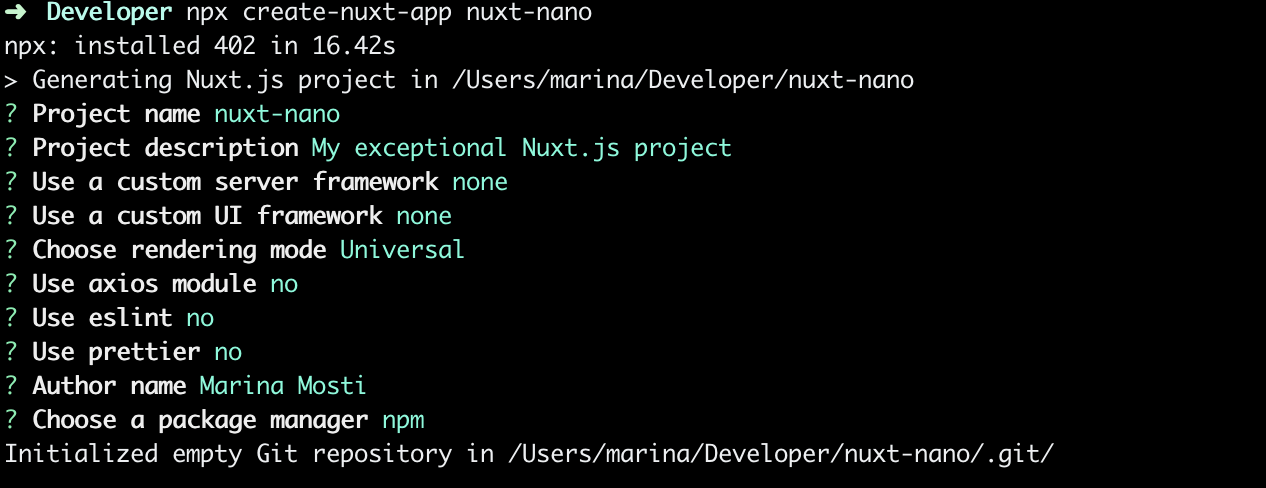
Fire up your terminal of choice, and run the following command:
npx create-nuxt-app nuxt-nano
The argument after create-nuxt-app, nuxt-nano, will be the name of our folder.
The tool will create for you a bunch of settings you can configure, so let's take a look.
- Project name This simply sets the name of our project, and is your choice.
- Project description A short description for your project.
- Use a custom server framework If you choose one of these, Nuxt will use it for server-side code. You can choose
nonefor now, as this is beyond the scope of this nano. - Use a custom UI framework If you choose one here, it will be installed and plugged in to your project automagically! Let's however choose
nonefor this project. - Choose rendering mode
Universalwill use both SSR and client side rendering, so this is great for SEO tracking.SPAis the typical single page app with client side rendering. We pickUniversalin this case. - Use axios module Adds the popular HTTP library Axios to your project. Select
no. - Use eslint Adds eslinting to your project. We're going to go with
nofor this. - Use prettier This adds Prettier, a library that formats your code, to your project, but we're going to also say
no. - Author name Time to sign your name!
- Choose a package manager This allows you to use either npm or yarn as your package manager, we're using npm for this nano - but feel free to choose yarn if that's your preference.

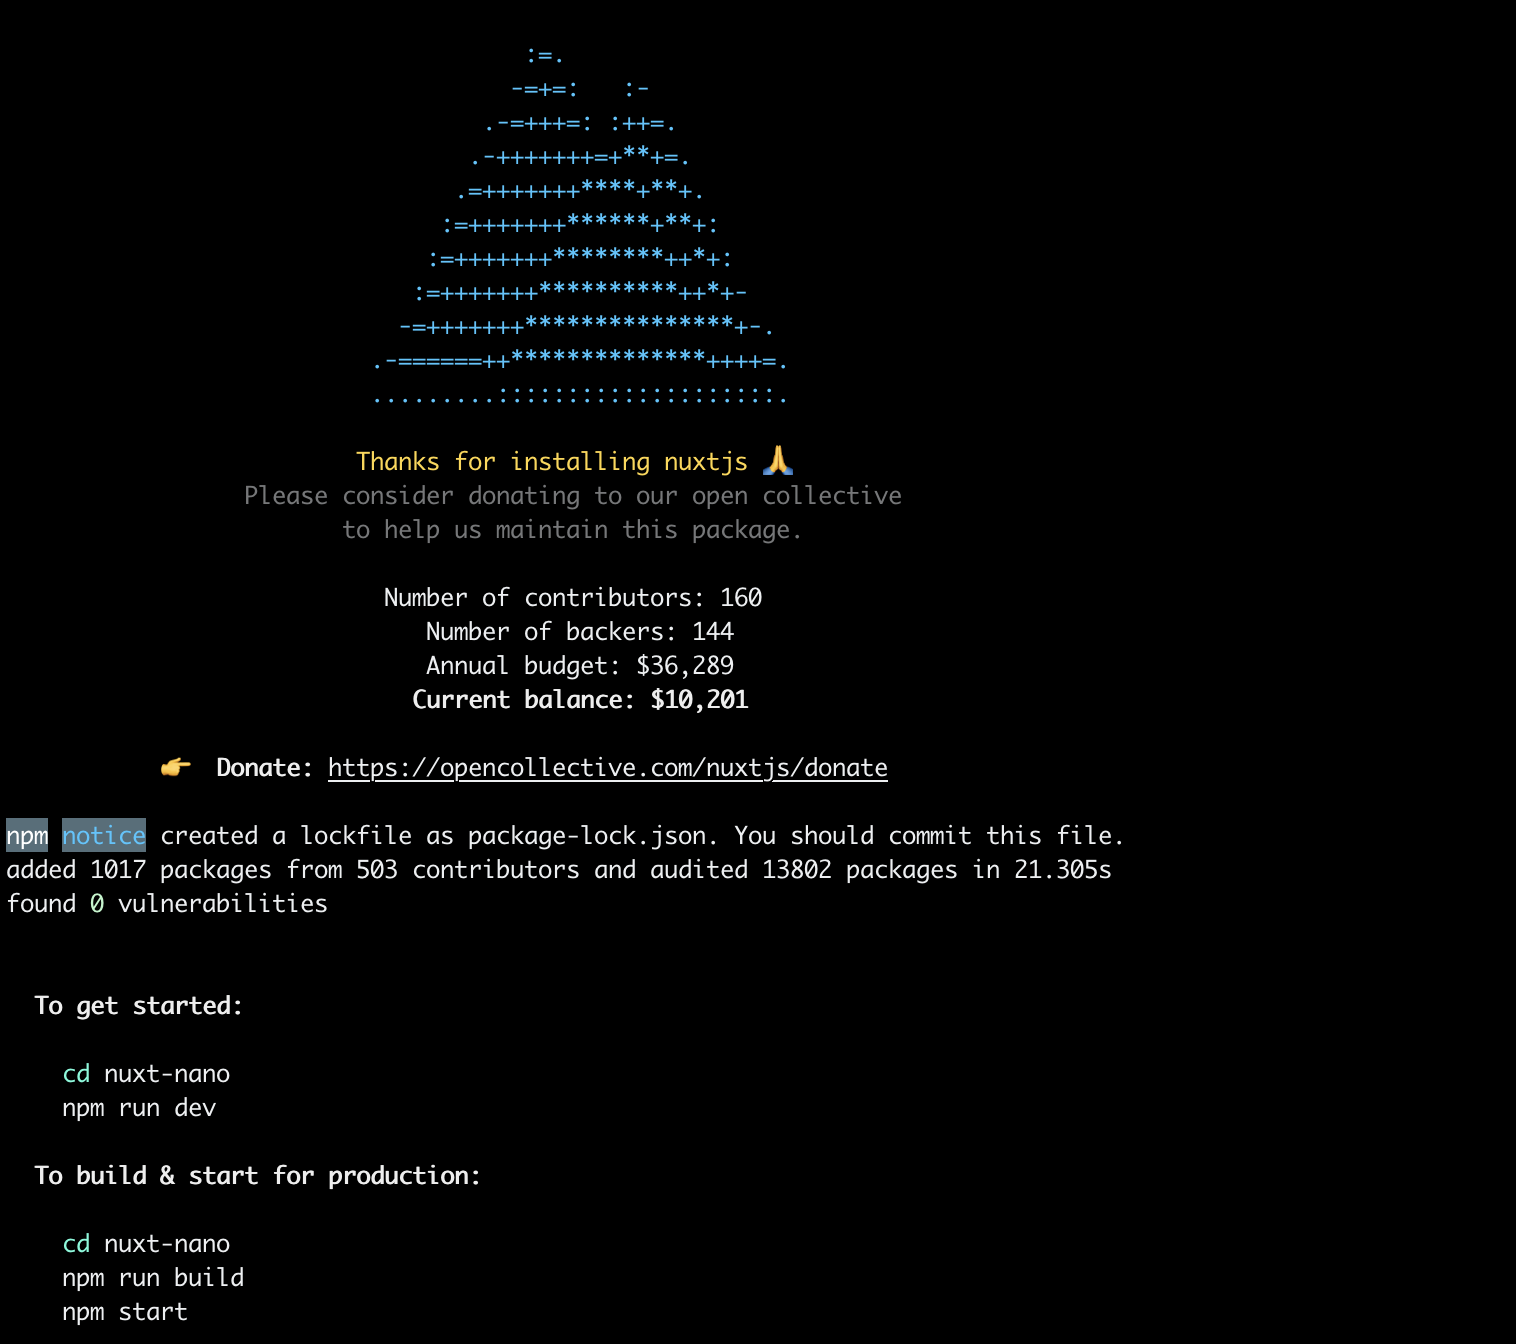
Once you're done selecting all your options, create-nuxt-app will wrap it up by installing the required libraries and creating the folders and files, and will end by welcoming you to your new app with some useful commands!

# Exploring the structure
Fire up your text editor of choice (VSCode is a good choice), and open up the nuxt-nano folder that the CLI (Command Line Interface) just created for you.
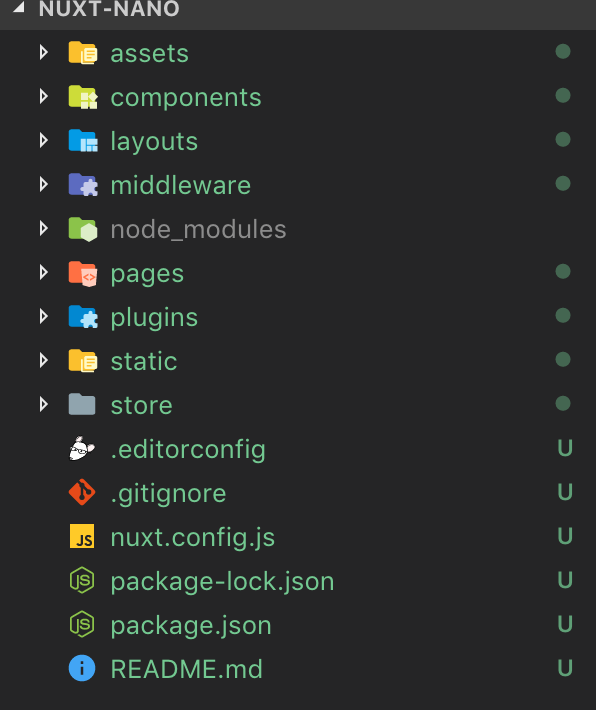
You should see this structure on your file explorer:

Let's take a closer look to the folders:
- assets This is a folder for placing images, css, and just about any media assets that you will need for your project.
- components In here, you can place components like your
Header.vueor yourFoxyButton.vue. - layouts Layouts are
.vuefiles that are used to provide a general structure for your page. For example, you may place a structure that includes your Header, Footer and a spot for your dynamic content. More on this later. - middleware Middleware are custom functions that allow us to plug-in functionality before rendering a page; it acts directly on the http request. Middleware is a HUGE subject worthy of its own workshop, but if you want to delve deeper into it, check out the official docs (opens new window).
- node_modules This holds your app's dependencies.
- pages This is where we will put our actual pages and content. More on this later!
- static This folder is used for placing assets that will never change, like the
faviconor therobots.txt. Everything you put in here will be mapped to/so, if you make a folder inside calledstuffwith a filesecret.txtyou will access it through<url>/stuff/secret.txt. - store This folder is for placing your
storefiles in case you're using Vuex. It's empty by default, but if you want to activate it and use Vuex, add an index.js file and code away!
# Pages in Depth
The pages folder is one of the most important folders in a Nuxt app since it holds both our views and also our routes!
If you open it on your text editor, you will see that inside there is an index.vue file with some basic HTML/CSS content inside of it. Let's go ahead and run the project.
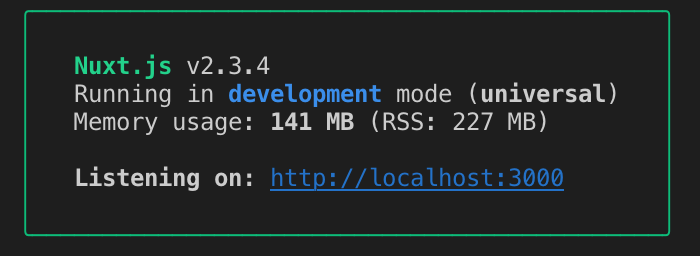
Open up your terminal and cd nuxt-nano into your app's folder. Once you're inside, go ahead and npm run dev or yarn dev to start up the compile process and start serving the content into your browser.
The terminal will show you in what url/port it's going to serve your app. Usually it'll be [http://localhost:3000]. Go ahead and open the URL in your browser.

💡
If at any point you need to stop the server, you can control + c to quit it.
The folder structure in Nuxt is important for determining your app's pages because it will be exactly mimicked as a route on your application. For example, go ahead and create an about.vue file with some dummy content.
<template>
	<h1>The About page</h1>
</template>
2
3
If you now head on your browser to http://localhost:3000/about, TADA~ The route has been automatically created and served from your Nuxt application.
There is another way to set up your routes, which provides for a "cleaner" stucture. It requires that instead of a component, you create a folder for each route with an index.vue file inside for each route. (Think of single HTML files in a folder structure).
Create a contact folder with an index.vue file inside with dummy content.
<template>
	<h1>The Contact page</h1>
</template>
2
3
Now go ahead and navigate to http://localhost:3000/contact
# Dynamic Routes
If you ever need to create a dynamic route, for example to pass data over the URL, there is a special syntax you need to use.
Say for example that you have a blog and want to have a route that allows you to fetch a post by its id. This would look something like http://localhost:3000/posts/123 where 123 is the post id.
Creating a folder and an index.vue file for each post is less than ideal, so there is a special way we can define this.
Under pages, create a folder posts, inside a folder named _id and inside, you guessed it, an index.vue file.
Now paste this code inside:
<template>
    <h1>Viewing post with ID: {{ $route.params.id }} </h1>
</template>
2
3
Check out http://localhost:3000/posts/123 in your browser, and you will see 123 displayed as the post ID for that page. If you look closely at the code, you will notice that you are retrieving the ID paramter through $route.params.
The actual NAME of this param is taken from the name of the folder that contains it, so in this case we named it _id and our param is named id!
# Layouts in Depth
Layouts are a way to define a "global container" for your views. This is easily understood by example, so let's dive right in.
Go into the layouts folder and open up default.vue.
You notice the <nuxt></nuxt> element? This is where your views are actually being loaded. Place an h1 tag above it like so:
<template>
	<div>
		<h1>Hello from default.vue</h1>
		<nuxt />
	</div>
</template>
2
3
4
5
6
Now, navigate back to your browser and open up http://localhost:3000 or any of the routes you have created on this nano.
The template is now serving an h1 tag in all your routes! This example is obviously not ideal, but a great use case if setting up your nav and footer here.
If you ever want to have another template (for example one that doesn't have a navigation, or an entirely different layout), you can go ahead and create a new file inside the layouts folder.
Every top level file inside this folder will be a new layout. So for example, create an example.vue file and set it up.
<template>
	<div>
		<h1>Hello from Vue Vixens!</h1>
		<nuxt />
	</div>
</template>
2
3
4
5
6
Now, we need to tell our page to use this layout. Open index.vue inside the pages folder and add a layout param to the script.
<script>
export default {
  layout: 'example'
  // Other code
}
</script>
2
3
4
5
6
Go ahead and take a look at your home route now!
# Conclusion and Challenge
Nuxt is a framework with a ton of possibilities and intricacies. This nano barely scratches the surface but is a quick way to get you started developing SSR applications.
Your challenge, if you're up to it, is to create a completely new layout and add some more pages that include two levels or more of nested dynamic paths params!
# Badge
Congratulations! You have earned a badge!

# Author
Made with ❤️ by Marina Mosti